Easy Sourdough Starter (Made with Yeast)
Here's a super easy, no-fail way to start your sourdough starter, and it takes less than 10 minutes.
Ingredients
- 1½ teaspoons active dry yeast (about half a packet, 0.2 ounces, or 6 grams)
- 2 cups warm water
- 2 cups flour
Instructions
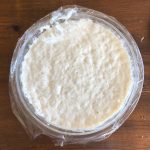
- In a mixing bowl large enough to let your starter double or triple in size, combine all ingredients. Stir well and cover with plastic wrap. This is your Day 1. You should see a lot of activity this first day.
- If you prefer to store your starter in a glass jar, make sure there is enough room for the starter to double or triple in size. Do not seal, but leave room for air to come in and out.
- Place in a warm area of your kitchen.
- For Days 2-6, stir daily, scraping down the sides.
- On Day 6, stir well. Discard or bake with 1 cup. Feed the remaining starter 1 cup flour and 1 cup water. Stir well and let it sit on the counter overnight.
- Stir and place in the refrigerator. You don't need to stir it daily, though I recommend it. Repeat the above step once a week, allowing the starter to come to room temperature before feeding and removing one cup to bake with.
- If you need to take a break from your starter, freeze it after you feed it. Read more about that here: https://www.friendshipbreadkitchen.com/tutorial-storing-amish-friendship-bread-starter-for-future-use/
Notes
- Make sure your yeast is fresh. To proof or test your yeast, combine the yeast with ½ teaspoon sugar and ½ cup of the warm water. Combine and wait 10-15 minutes. It should get bubbly. If you don't see any bubbles, your yeast is old and shouldn't be used.
- If your yeast is good, you can use this mixture in place of the yeast in the recipe, and add only 1½ cups warm water in the recipe since you've already used ½ a cup in the yeast mixture.
- You can also use instant yeast (also known as rapid rise yeast).
- Use this starter to make any of the traditional sourdough recipes in the Recipe Box.
- Understand how to take care of your starter (the same principles apply to AFB starters and regular starters): Maintaining a Healthy Amish Friendship Bread Starter and How to Get a Bubbly, Active Amish Friendship Bread Starter
- If you notice any hooch in your starter before you hit Day 6, you need to feed your starter sooner rather than later. This will happen if the temperature in your kitchen is warm, or if you have a really hungry starter, LOL. If this is the case, jump ahead to Day 6.