Traditional Sourdough Starter
Traditional sourdough starter is made from water and flour and allowing it to pick up the "wild yeast" from the air. This will give you the classic sourdough loaf when baked.
Servings: 1 jar
Equipment
- 1-2 medium sized mason jars (mine are 24 oz.)
- Paper towel
- Rubber band
- Digital scale
- Wooden spoon
- Small mixing bowl
Ingredients
- 4½ cups bread flour
- 3½ cups room temperature filtered water
Instructions
Day 1:
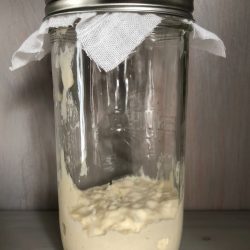
- What you do: Add ⅔ cup of flour (100 g) and ½ cup (100 ml) of room temperature water to a bowl and mix until smooth. Add the mixture to your clean mason jar. Cover the jar with a paper towel and top with the outer ring of the mason jar lid (this allows the starter to breathe--you never want to seal it completely). The next step is the most important: give your starter a name! This is a tradition in the sourdough world, because you are going to love, feed and care for it like your own. Now place your starter in a draft-free area--avoid cool or cold temperatures.
- What you will see: Nothing but flour and water and no activity.
Day 2:
- What you do: Add another ⅔ cup (100 g) of flour and ½ cup (100 ml) of water in a bowl, add this mixture to your starter and mix together until smooth. Place it back to rest for another day.
- What you will see: Maybe a few bubbles.
Day 3:
- What you do: Take out 3 tablespoons (50 g) of your starter and add to a new mason jar. Feed this new jar with another ⅔ cup (100 g) of flour and ½ cup (100 ml) of water. Keep what’s in the original mason jar covered in the fridge for another day and another recipe (this becomes your discard jar).
- What you will see: No growth but a lot of bubbles; it may smell a little. This is a good sign that you are beginning to cultivate natural yeasts. The smell will dissipate when your starter is a little more mature.
Days 4-7:
- What you do: Complete the same process as Day 3. You don’t have to use a new jar each time, just remove all but 3 tablespoons (50 g) before feeding and make sure to add what you removed to your discard jar. Now you need to feed your starter TWICE a day, morning and night, about 12 hours apart.
- What you will see: Day 4 - Activity! you should start to see some rise or volume every time you feed it. But it is not yet ready to bake with, you need a few more active feedings. Day 5 - More activity! Yay! This is where you add a rubber band so you can track the growth. Day 6 - Your starter should rise and fall. Day 7 - Your starter should now be doubling in size every time you feed it. If not, see the Tips & Tricks section below to troubleshoot. Congratulations, you are now ready to use your starter to bake!
Notes
- Make sure your kitchen is draft-free and not too cold when growing, maintaining, and storing your starter.
- When possible, use slightly warm water to get it going.
- When possible, use only filtered or bottled water, depending on where you live, as the chemicals in the water can kill the good bacteria needed to grow your starter.
- When possible, use a high protein, good quality bread four OR split the flour amount in half and use two different flours (for example, half spelt and half bread flour).