If you’ve fallen in love with Amish Friendship Bread and the many recipes you can make with the starter, you may to want to keep an active starter on your counter at all times.
Why some starters make it, and others don’t
From time to time, I’ll hear from someone whose once-thriving starter has fizzled out. Once that has happened, sadly, there’s no getting it back. When you’ve put a lot of time and energy into growing a starter, this can be super discouraging. Follow the steps below, and you’ll have a healthy starter that will last for years.
First things first: you’ll need to graduate from a plastic bag to a large glass mixing bowl or jar. Read this post on what kind of container you should use. This ensures that you’re able to mix the starter well and that it’s getting lots of air (note: do not seal the lid tight. We hook the latch to help manage potential spillage but don’t close it all the way so air can travel in and out). Here’s the jar we use at the Friendship Bread Kitchen, the Bormioli Rocco Fido Square with Blue Lid:
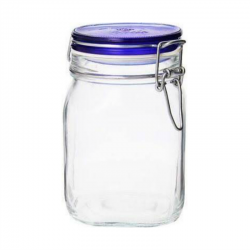
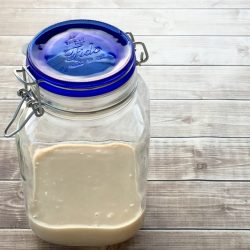
Size matters! This container is almost 68 ounces, about half a gallon or 8 cups. Anything smaller risks spillage if your starter gets really happy (and for some reason, this always happens when you’re asleep). I learned this the hard way.

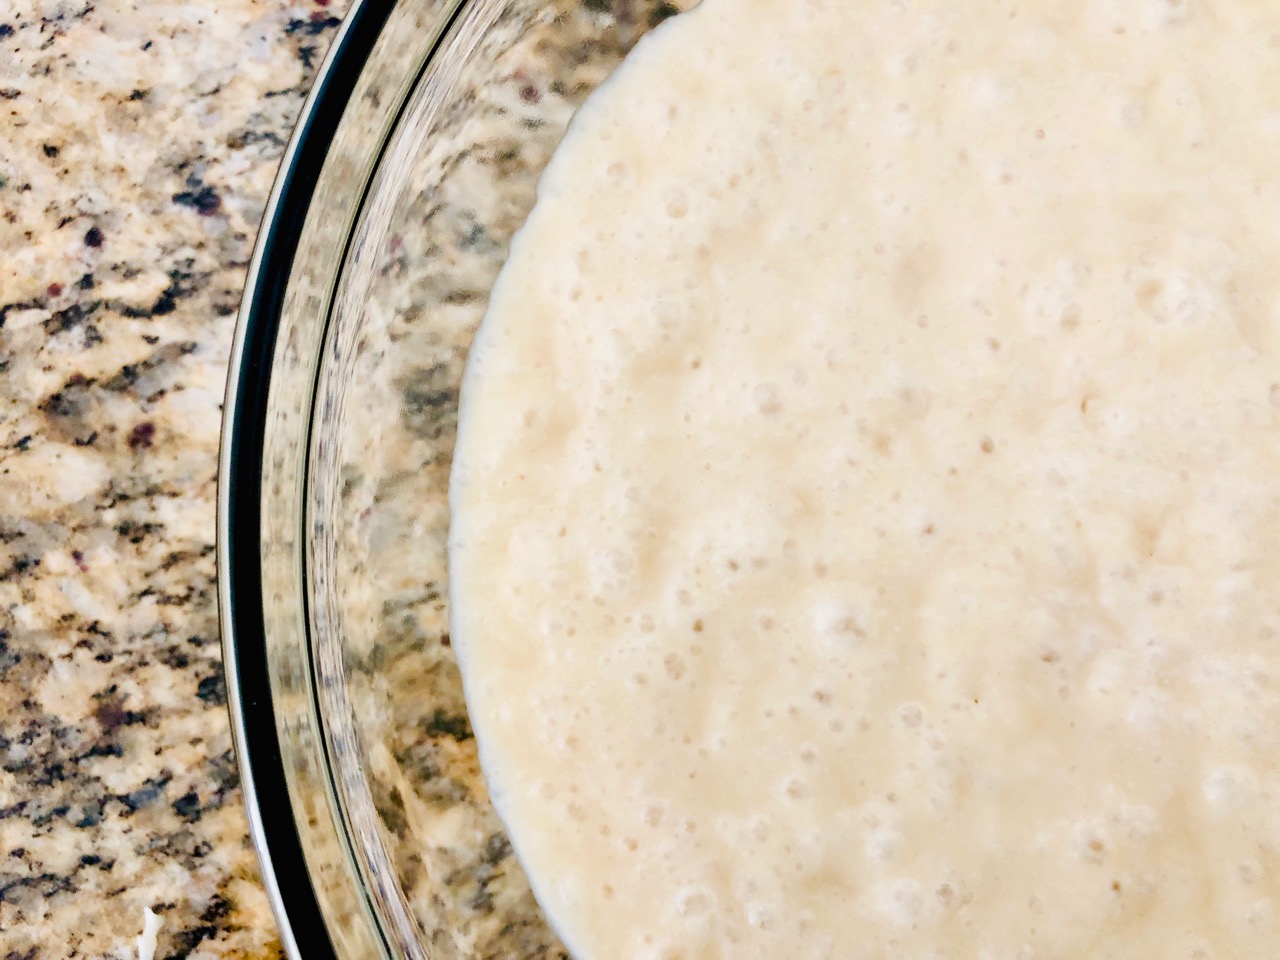
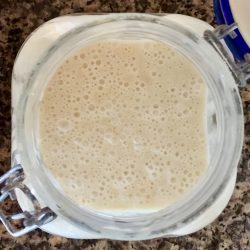
The actual volume of the starter (above) is about half of what you’re seeing. Once stirred, it went back down to about 4 cups, so you want to make sure plenty of room for it to get bubbly and frothy, especially after a feeding. I’ve learned to keep my overall stater volume to no more than 1 to 3 cups, because if you’re regularly feeding it at the and, as you probably know, it won’t be long before you will have starter coming out of your ears. Ultimately the size of the container is up to you, but these jars are just the right amount for me and the Friendship Bread Kitchen.
How much starter is too much starter?
Which brings us to the question of how much starter should you keep on hand. Remember this: you have to feed your starter regularly with the right proportions of milk, flour and sugar. The 10-day instructions assume you are starting with a single cup of starter. However, I know people with a jar on their counter that contains 6+ cups of starter, but they feed it the same amount as they would a single cup of starter. In other words, you may not be feeding your starter enough. The poor thing’s starving! This is one of the surest ways to start killing off your starter. By accident, of course.
If your starter isn’t being fed enough (1 cup each of flour, sugar, and milk to every 1-2 cups of starter), your starter might grow for a while but it won’t thrive, and it will eventually die out. There just isn’t enough new flour, sugar, and milk to go around. Let’s assume you have four cups of starter in your jar. In order to feed it at the proper ratios, you would need to add (max) 4 cups of milk, 4 cups of sugar, and 4 cups of flour. And then the next week, you’d have to add even more! I think we’re going to need a bigger boat, people. Want to know what happens when you have too much starter? You can read about it in my novel, Friendship Bread (Ballantine Books/Random House). It can get out of hand pretty fast.
To ensure you have a healthy and hardy starter, your need to regularly reduce the volume down to 1 to 3 cups every week. You can bake, give away, freeze the extra starter, or discard it. What’s remaining will be your new base.
To recap:
- Maintain your starter in a good-sized glass or porcelain container, mixing bowl, or jar.
- Your existing starter should be no more than 2-3 cups and already healthy and bubbling.
- Stir daily.
- Once a week, you need to feed your starter. Here are the ratios I use:
- If you have 1 cup of starter, add 1 cup each of flour, sugar, and milk.
- If you have 2 cups of starter, add 1½ cup each of flour, sugar, and milk.
- If you have 3 cups of starter, add 2 cups each of flour, sugar, and milk.
- Mix well and then immediately remove or discard enough starter so you only have 1-3 cups remaining in your container. For the starter you removed, you can freeze it, give it away, bake with it, or discard it.
- Repeat steps 3 through 5 every week, and soon you’ll have a hardy, thriving starter!
Reducing your starter
If you need to reduce the amount of starter you keep on your countertop, here’s a tutorial on how to do that.
Hello, I am new to baking with Herman. Here is what I’ve done. I made the starter, fed it on day 5, waited another 5 days and then baked cinnmon-raisin-scones. Delicious. (I do not like the traditional sourdough, too harsh/sour.) I fed the remaining starter, which was about 2 cups, with 1 cup of flour, 1 cup of milk and 1 cup sugar. He is alive and well. Do I need to wait another 10 days, feeding it on day 5, waiting 5 days and then using it, or can I use it a few days after baking the scones and feeding it?
I’m completely new to this.
Does starter stay in the fridge or on the countertop?
The counter.
Should i split my starter every time it is fed? The 10 day guide directions i received from a friend had me feed it in day 5 (today) should i split it now or wait until the next feeding on day 8 like those directions mention?
Wow! Thank you. This makes sense. I wondered why I had to start all over with the 10 day routine if I already have an active starter. I love working with this starter…much more than sourdough! I have made so many things this week from sweet to savory. The sandwich bread is really good! What an enjoyable adventure in. Baking!
Help! A friend gave me a bag with the instructions this week and told me it was on day 5! I forgot to add anything to it yesterday and I only remembered to add the ingredients today (day 7). Is it okay if I’m one day off? Can I just pretend I’m still on day 6 now that I’ve added new ingredients or have I ruined it?
Hi! I accidentally added 1.5 cups of milk to my starter on day 6 🙁. My starter was probably only about one cup as I had been following the directions to divide it accurately up til now 🤣. In an attempt to fix it, as I couldn’t find anything clear online, I added 1.5 cups of flour and sugar so everything was “even.” Reading your article, apparently I’ve now fed a 1 cup starter as if it was a 2 cup starter… what do I do!!? Help, please!! 🤣
Help! I have AFB starter on my countertop… but it develops green or white mold circles. I moved it to the bedroom, thinking it would be cooler with less sunlight and that would discourage mold. But it still gets moldy!
What am I doing wrong?
Throw it OUt. It’s spoiled.
Thank you for these instructions for maintaining our starter. I plan on trying the refrigerator plan this time. I did my first batch in many years a couple of years ago and was able to share the remainder. However my next batch I had to freeze. I just got out a bag to revive to use and it doesn’t look like it is going to be useable. I thawed it, fed it and started with day 6. It isn’t bubbling or doesn’t seem active at all. Smells like flour. No yeast smell at all. I am going to wait until day 10 ( stirring each day of course) and if it doesn’t look good I am going to make a new batch. Thanks for all your wonderful information and recipes on this website! ❤😊❤
Hello what if my friendship bread starter has a strong smell of alcohol??? Does that mean it has gone bad? What should I do?
Hi Larry! A normal strong yeasty smell is normal. However, if it starts to smell more like paint thinner, it may be hungry. Here’s a great post about what your starter should smell like: https://www.friendshipbreadkitchen.com/tutorial-what-should-your-starter-smell-like/
Thank you Rebekah
What happens if you don’t feed on the 6th day? Do you have to start over, or go ahead and add the 10thday?
Hi Patricia! Check out this post here: https://www.friendshipbreadkitchen.com/faq-i-forgot-to-feed-my-starter-should-i-throw-it-away/. If you didn’t make your starter from scratch (but got it from a friend), and it feels a little sketchy, you can either feed it immediately and see what happens or if you don’t want to waste ingredients, make your starter from scratch. There are a lot of tutorials/helpful FAQ’s in the LEARN area of the website to help you figure out if your starter is healthy. Good luck!
If I follow your advice to reduce my amount of starter to 1/2 cup and then follow a 7 day cycle, do I feed only once in that week AND bake on the same day? I’m new to this and have been following the 10 day cycle, but I have no one to give starter to and throwing the extra out seems so wasteful. Thoughts?
Hi LuAnne! Yes, you would only feed once a week. You can bake on that same day you feed, but once your starter is established, you can also bake on other days, as well. Here’s a great post on when can you bake with your starter: https://www.friendshipbreadkitchen.com/faq-how-soon-can-i-bake-use-my-amish-friendship-bread-sourdough-starter/
Hello. Thank you for this wonderful information. I need to know if the starter I have is still good and safe to use. I was given the starter on July 13th which actually was baking day. This is the 19th and I still haven’t baked the bread. It’s been in the fridge all this time, but other than “kneading” it once in a while I haven’t fed it. It smells fine and it tastes okay… Can you advise me as to whether it’s safe to use? Thank you in advance!
Hi Frances! If it’s in the fridge, you’ve probably slowed down the growth which means it should still be ok! I would give it a good stir (and feeding) and see if it seems active once being put in room temperature!
I am reading your website with much interest. However, I am unclear as to what “100% hydration” means. Please help.
Hi Melody! It means that you’re feeding your starter with an equal amount of ingredients. So for Amish Friendship Bread, 1 cup of starter = 1 cup flour, 1 cup sugar, 1 cup milk. For traditional sourdough starters, 1 cup of starter = 1 cup flour, 1 cup water. Some people play with these proportions depending on what they’re baking, but that’s more for traditional sourdough starters. With AFB, just stick with these ratios and you’ll be fine. 🙂
Why on day six do you add 1 cup of flour sugar and milk and then on day 10 you add 1 1/2? Is day 10 feeding different from day 6?
Hi Maria! The amount you’re feeding your starter is actually closer to a 1:1 ratio of the size of your starter. Therefore, by day ten your starter has usually grown, which means you should be feeding it a larger amount. This post should also help with figuring out how much to feed your starter: https://www.friendshipbreadkitchen.com/tutorial-how-to-get-a-bubbly-active-amish-friendship-bread-sourdough-starter/
I bought the recommended jars and they are great. You can partially close the jars because the latch will keep it propped open a bit. Enough to get air without worrying about anything falling in. I’ve given up on plastic bags.
When you have a bubbly mess do you add more flour/sugar/milk to make up for the mixture that oozed onto your counter? I don’t want to lose this new batch because she seems very active!
Hi Barb — As long as you have 1 cup of starter left, you’re fine. Just stir well and when you feed, feed at the correct ratios depending on the amount of starter you have in your jar or container. So if you have 1.5 cups of starter, you’ll need 1.5 cups of flour, 1.5 cups of sugar, and 1.5 cups of milk.
I made the starter and used 1 cup for the cinnamon bread. What do I need to do with the remaining 1 cup bags? I would like to give them to friends but I’m not sure what I should tell them to do to keep them going. Can I get a schedule of some sort to pass on with the starter?
You can freeze the bags or you can give them to your friends and have them start the process over as well. If you don’t think they want to continue after 10 days (though they might surprise you!), then on Day 10 they can just bake with 1 cup of starter (don’t do the Day 10 feeding) and discard the excess.
Are you closing the lid on the jar or do you leave it open? Iam wanting to maintain some starter at all times but I didn’t see anything about closing the jar lid.
I have a sourdough started and for the longest time was going at it all wrong. To make the most out of the starter, you have to treat it correctly…It’s kind of like a baby!
Great tutorial to get started.
This tutorial is very helpful!
I love making the friendship bread! Haven’t seen it around in awhile. Maybe it’s time to make it and share! Thank you~!
It’s too hot during the summers here to bake. I never realized I could freeze the starter rather than starting over!! You inspired me to restart so I may try freezing next summer
I come back to this tutorial often. My absolute favorite
This is my favourite tutorial. I go back to it often.
I love this tutorial. I never knew some of this info and have done starters many years ago. I decided to start again. This is tge best dough I’ve ever had. Thank you!!
I found this most helpful and have printed it out for future reference! Thank you!
I received my sourdough starter in March 2009 from an elderly lady. She received her starter in 2004. My first thought was I am going to kill this one too. I am still making the sourdough bread and rolls. I also used the same recipe to make a cinnamon swirl loaf and pecans, brown sugar and cinnamon for the pecan swirl. I also sell a lot of it throughout the year to friends, at farmer’s markets and local fund raisers. It is also a wonderful donation for a school auction. I have had as many as 9 jars of starter going at once.
Hi Linda! It sounds like you’re doing a fantastic job of keeping your starters alive … all 9 of them! I hope you’ll save this story for 2019 — we’re having a call for submissions for stories about Amish Friendship Bread, and I sense you have a good one, LOL! Happy holidays to you and yours!
Where do I find the sugar free version of the starter?
Hi, I loved the starter tutorial. I used to make this a lot, but needed a new starter recipe. Thanks so much.
Jackie Epema